Lorenzen's badly worded tabard tutorial.
Okay first things first.. the tools i use are as follows..
a number 2 flat chisel colour shaper (firm) a number 0 taper point (extra firm) and a number 0 flat chisel (extra firm)
a
sharp craft knife (new blade is preferable) and a slightly bent old
airbrush needle (.05) for prodding stuff with.. essentially a really
long pin.
Stage 1.
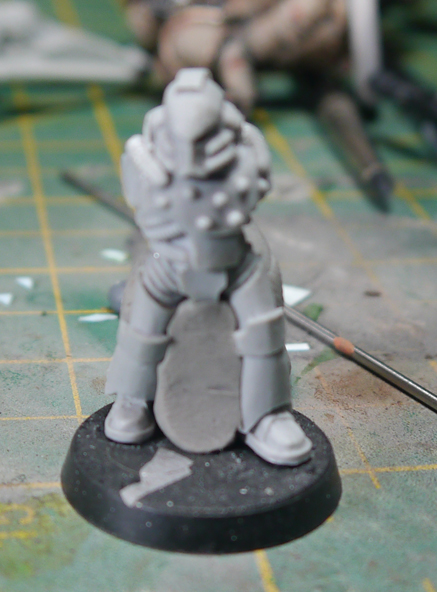
bodge
some sculpey in between your intended marines legs, it should roughly
lie flat with the crotch piece and should extend to the base somewhat
smoothly.. this is what you will be pressing against when you sculpt.
Stage 2.
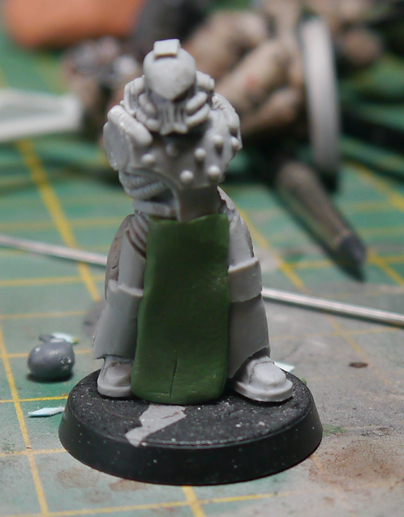
mix
up some putty and roll it flat (rolling it out on forge world bags
helps it not end up stuck to your desk and unable to remove it neatly)
personally i like to use a mix of about 70% greenstuff 30% sculpey for tabards
this retards the drying time of the greenstuff quite drastically and if
heated slighty after the greenstuff has cured, will dry a little harder
(becoming easier to sand, carve etc) of course
you can use miliput instead of sculpey, then it will dry rock solid.. this is usefull for cloaks which need to be more robust.
this is cut roughly to size and applied to the model.
Stage 3.
if
necessary cut the putty down to size at the top, (my guideline was the
nodules to either side of the assault armours main plate.) and flatten
the putty down to the model more.
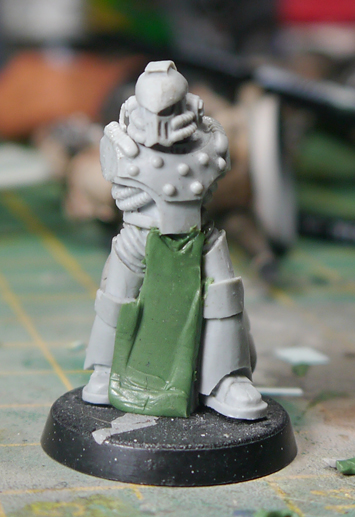
this
is where the proper sculpting starts.. cut out a small triangle at the
very top of the putty using your knife (this can also be a semi circle
if you want a less defined hang) under this you want to push another
triangle into the putty with the flat chisel (0) clay shaper.. you're
aiming to make the lower edge deeper than the top edge and for a small
ridge in the middle of the triangle.
Stage 4.
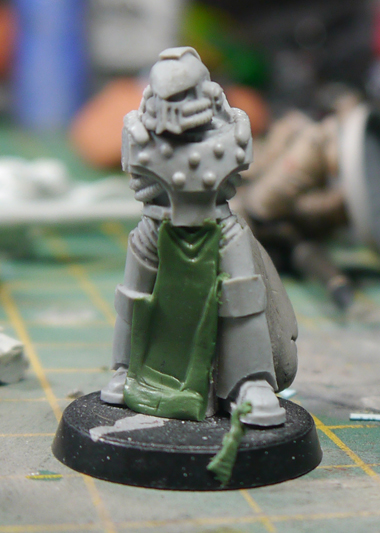
create another triangle under the 1st getting somewhat wider this time.
Stage 5.
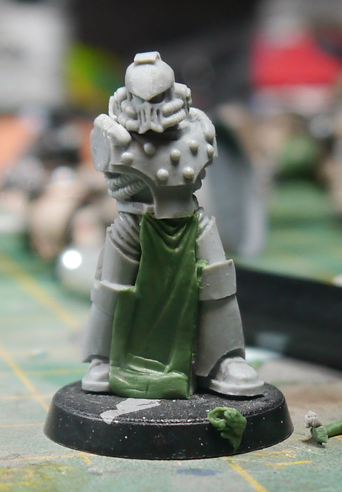
create yet another triangle (all be it a wonky one) these will eventually create the main folds of the tabard.
Stage 6. (the most important one)
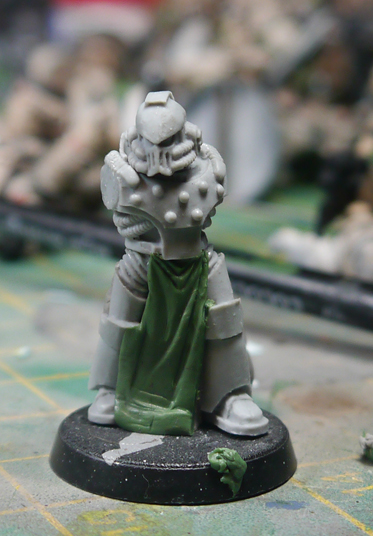
define
the middle section of this fold, add in the "ridge" and start to define
the curves more, i also added a long ridge along the thinner side of
the tabard to define the edge more.
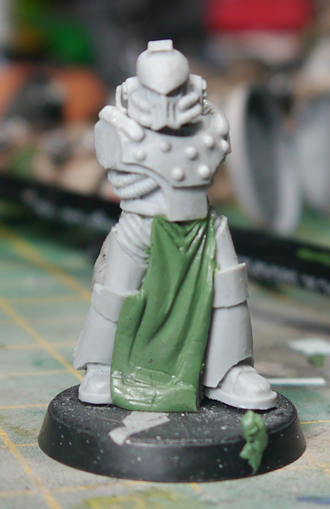
once
the middle section is more defined we start to blend in the other
ridges.. aiming for the same effect.. once again, on the other side of
the tabbard i added an extra crease, to define the overall shape.
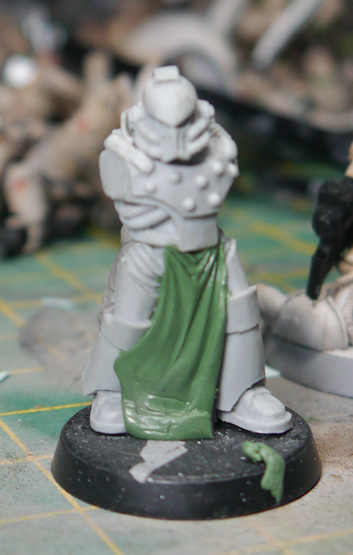
(to
add to the flow of the curves, i tend to work towards the base in
smooth movements, even if the crease loses its definition towards the
bottom, you should know where it would go.. would it interfere with
other folds?)
Stage 7.
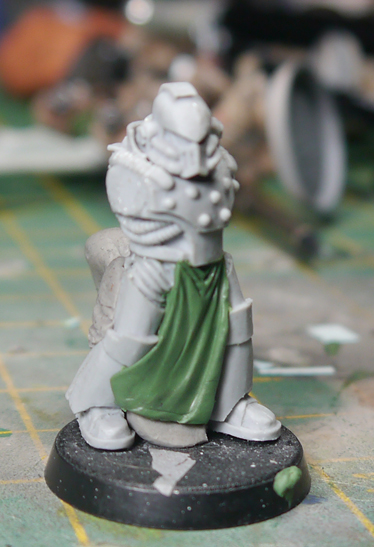
cut
the tabard along the bottom, this will create your lower edge and the
sharper the blade the less pressure is needed.. thus less chance of it
dragging at your hard work. its also a good idea at this point to neaten
up any existing work.. the top folds will most likely look less than
great at this point as the putty has moved all over the place and been
prodded a lot!
its at this point where i start to
create the curve in the non billowy side of the tabard.. this is done by
pushing out the ridge we created earler at the bottom and flattening it
down against the model.
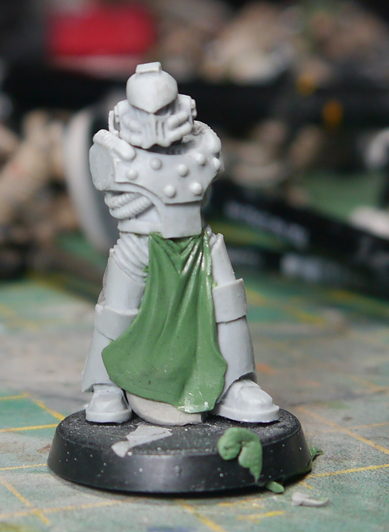
after
this is done, we cut the corner into the tabard so it looks less
squidgy and remove the recently pressed putty from the models leg..
(note the prod marks where my knife wasnt quite sharp enough to make it
clean!)
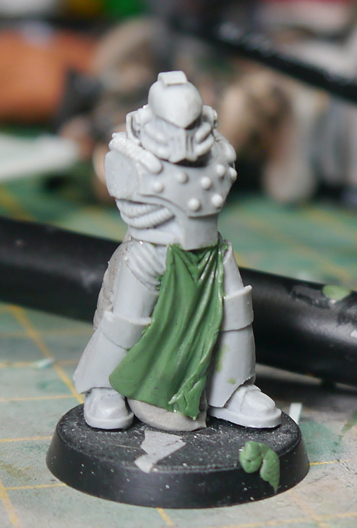
now this can be curved quite easily with a bit of prodding.. but can also leave unsightly marks in the tabard..
the
best way to avoid this is to roll a sausage of sculpey and use that to
press against (same as the rest of the tabard) then remove it once your
curve looks nice!
Stage 8.
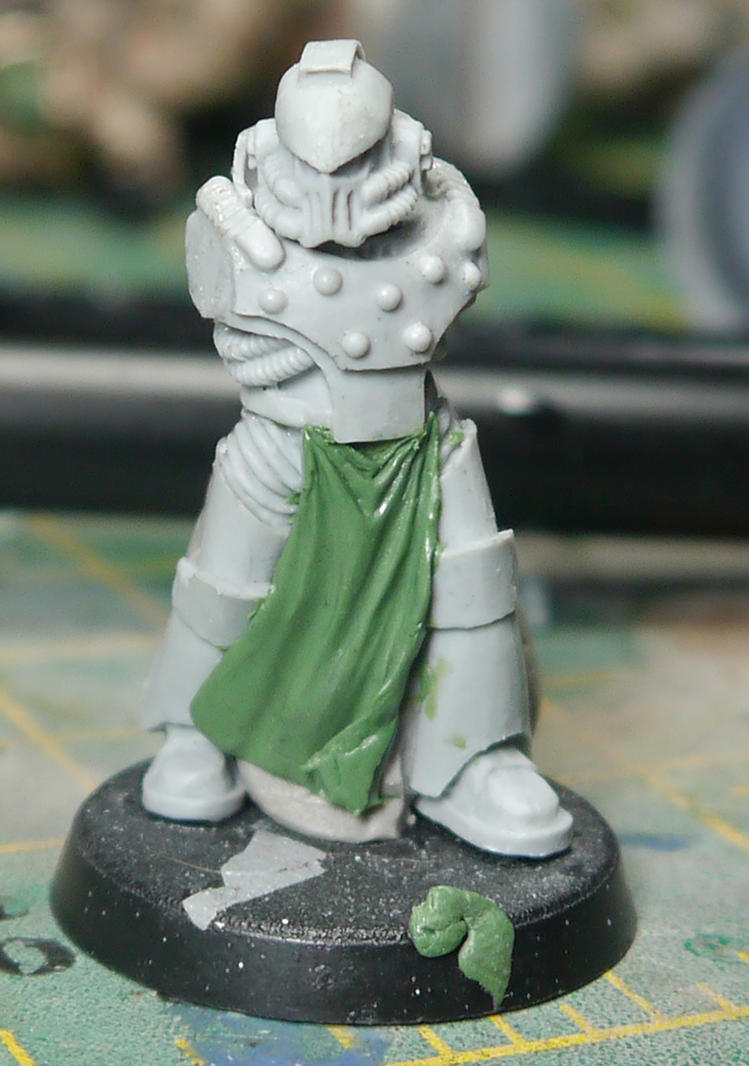
using
the tapered clay shaper we add some more definition to the overall
shape of the tabard, the curve of the shaper works nicely for making
natural curves in the material and the point on it allows us to
determine how thick they are.. follow the curves created by the folds
making them wider at the bottom and less defined.
once
again at this point, start to neaten up the folds near the top, and look
at the overall tabard.. does it look smooth? does anything look
unnatural.. if it does try and correct it by gently smoothing it over
with a clay shaper.. due to the mix of either miliput or sculpey in the
putty its workable much longer and also less sticky so easier to blend
and smooth.

once
you are happy with it, or feel you can't do any more to improve it,
leave it alone! once its cured you can cut a rough edge to look a little
smoother, or sand out a bump thats annoying you.. if you still think
you can do better, redo it.. how do you think i ended up with a redone
version of my hq in the first place?
The End.. Until you start asking questions.
hopefully
that all made sense.. as i say, if you need anything explained further i
can do that, but im crap at writing stuff out so i've probably missed
something hugely important.
oh and as a side note..
sculpey/greenstuff can dry a little rubbery as the sculpey requires heat
to cure.. in the case of kaels tabard, i left him to cure over night,
then blasted him with a hairdryer for a few minutes, then left him alone
for a bit. i do find it to be a little nicer to work with than
miliput/greenstuff for tabards, dunno why.. personal preference.


