Now i know only a few people look here (atm!) but this needs to be seen by everyone in the community really so its going up.
http://www.dakkadakka.com/dakkaforum/posts/list/330/524854.page
there is hard evidence within this thread showing who this guy is and his past scams.. do not use him.
Thursday, 9 May 2013
Tuesday, 7 May 2013
The Goldfish of Justice Tale of Painters..
So myself and a couple of friends from the wider world have banded together to create a tale of painters..
(can be found on the goldfish of justice facebook page) and i shall be attempting to blog my part of it on here.
it includes several really cool hobbyists including the overly talented Daemon Prince Dargor (DPA from warseer) Blindhamster from bolter and chainsword & Darkwrath and potentially more people too once they get off their arses.
Now I'm going to be continuing with the death guard in a mad dash for another painted 1000 points by gamesday.. after the initial 1k for the heresy weekender.. at approximately 250 points per month.
My first unit in this tale is my destroyers.. which is kind of a cop out as im doing half as many models as the other guys.. but then im also finishing lots of other things and theyre expensive points wise so i dont care that much..

This is how they stand atm.. need shoulderpads and to add some trophies to the sarge.. this lot are going to be a little bit more morbid than the normal death guard i think.

squad varlen are now complete and ready for the weekender.. theres a guy hiding in the back (guess he's camera shy) whos base you can just about see.. it isnt just 9 models!

and finally we have the current state of squad lor.. lead by Drogan Lor, who is one of my favourite models in this army so far.. think its the plague marine helmet tbh. Oh and for those that are interested.. the list of names for my dudes currently stands at.
Kael Armaros - Captain
Akran Hal – Moritat
Golthak – Destroyer Sergeant
Thias Varlen – Sergeant
Janek Peior – Siege Breaker
Gorthian “the Vulture” – Assault Sergeant
Selyvan Mors – Terminator Sergeant
Vlast “The Nightmare of Galaspar” – Contemptor Dreadnought
Thorian “The Denied” – Contemptor Dreadnought
Drogan Lor – Sergeant
And due to the fact that i was given a list of every Death Guard name in the current cannon for the heresy.. (which included 7 named captains........ >:( ) Kael is the successor of Holgoarg who was sent down to istvaan 3 in the 1st wave and eventually his executioner.
Sunday, 28 April 2013
Tabards: The Lorenzen way
Lorenzen's badly worded tabard tutorial.
a number 2 flat chisel colour shaper (firm) a number 0 taper point (extra firm) and a number 0 flat chisel (extra firm)
a sharp craft knife (new blade is preferable) and a slightly bent old airbrush needle (.05) for prodding stuff with.. essentially a really long pin.
Stage 1.
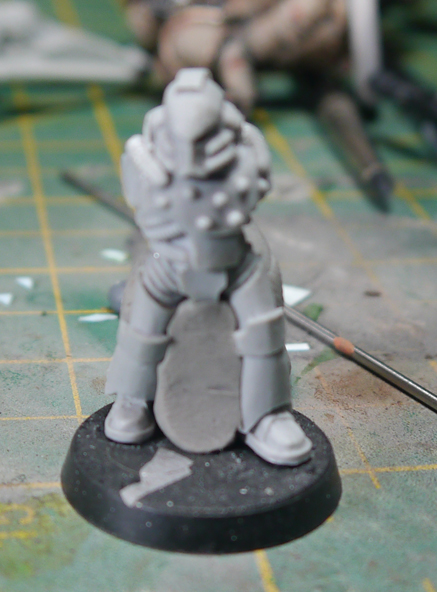
bodge some sculpey in between your intended marines legs, it should roughly lie flat with the crotch piece and should extend to the base somewhat smoothly.. this is what you will be pressing against when you sculpt.
Stage 2.
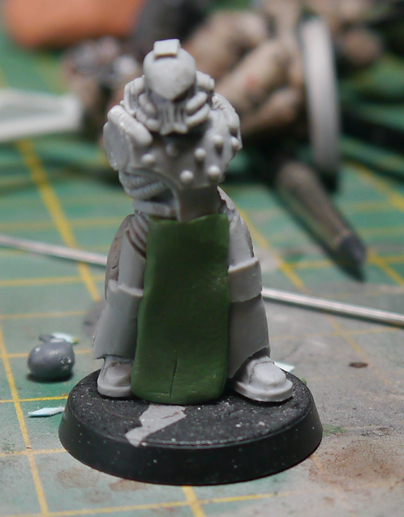
mix up some putty and roll it flat (rolling it out on forge world bags helps it not end up stuck to your desk and unable to remove it neatly) personally i like to use a mix of about 70% greenstuff 30% sculpey for tabards this retards the drying time of the greenstuff quite drastically and if heated slighty after the greenstuff has cured, will dry a little harder (becoming easier to sand, carve etc) of course you can use miliput instead of sculpey, then it will dry rock solid.. this is usefull for cloaks which need to be more robust.
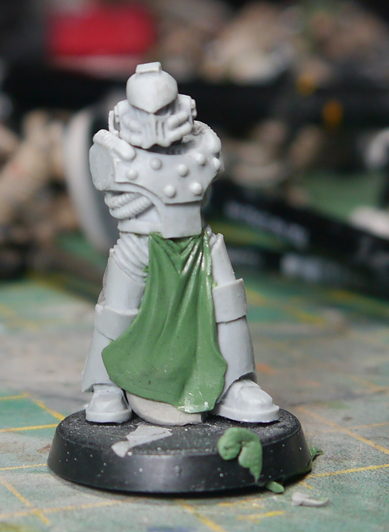
this is cut roughly to size and applied to the model.
Stage 3.
if necessary cut the putty down to size at the top, (my guideline was the nodules to either side of the assault armours main plate.) and flatten the putty down to the model more.
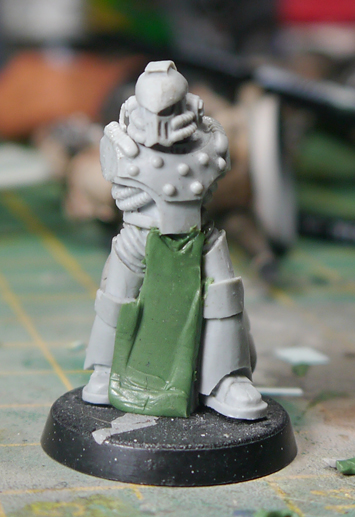
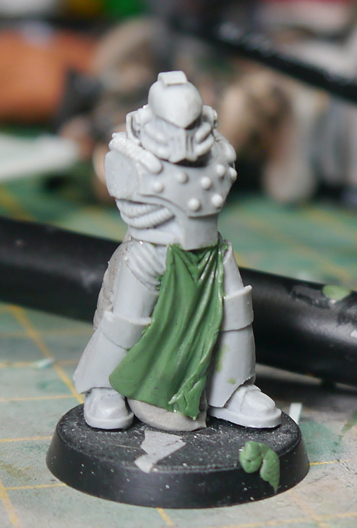
this is where the proper sculpting starts.. cut out a small triangle at the very top of the putty using your knife (this can also be a semi circle if you want a less defined hang) under this you want to push another triangle into the putty with the flat chisel (0) clay shaper.. you're aiming to make the lower edge deeper than the top edge and for a small ridge in the middle of the triangle.
Stage 4.
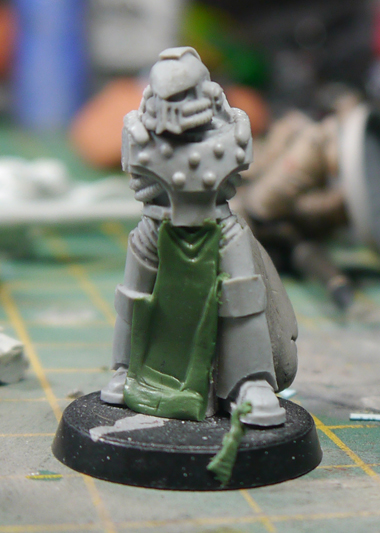
create another triangle under the 1st getting somewhat wider this time.
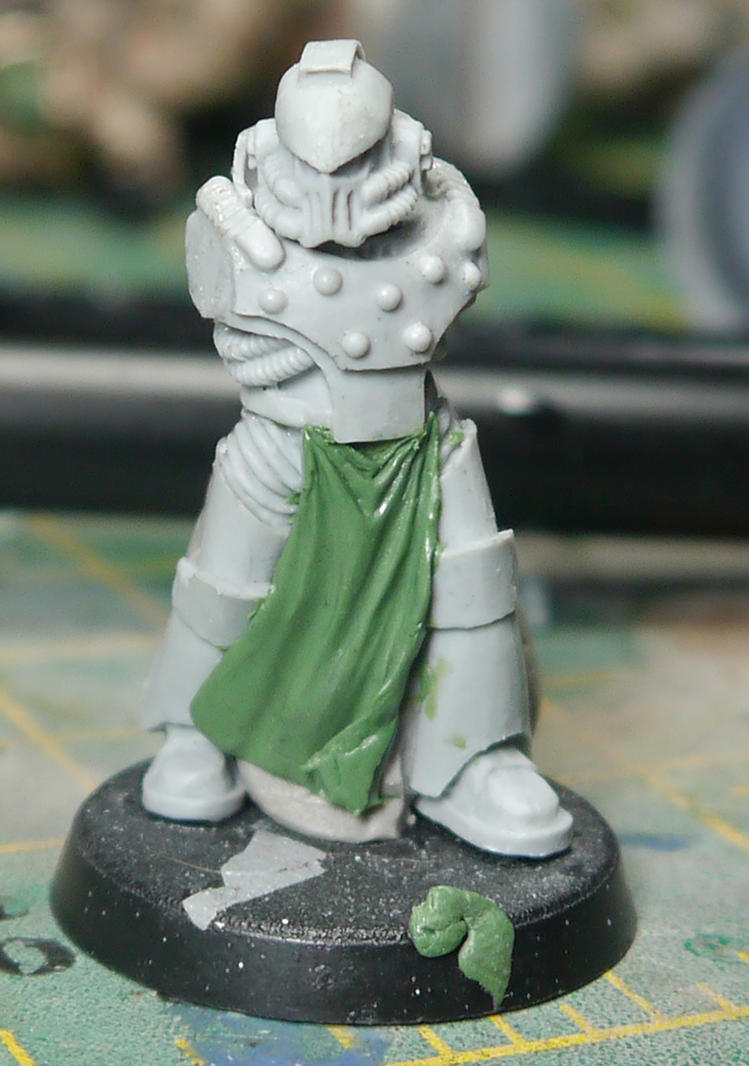
Stage 5.

create yet another triangle (all be it a wonky one) these will eventually create the main folds of the tabard.
Stage 6. (the most important one)
define the middle section of this fold, add in the "ridge" and start to define the curves more, i also added a long ridge along the thinner side of the tabard to define the edge more.
once the middle section is more defined we start to blend in the other ridges.. aiming for the same effect.. once again, on the other side of the tabbard i added an extra crease, to define the overall shape.
(to add to the flow of the curves, i tend to work towards the base in smooth movements, even if the crease loses its definition towards the bottom, you should know where it would go.. would it interfere with other folds?)
Stage 7.
cut the tabard along the bottom, this will create your lower edge and the sharper the blade the less pressure is needed.. thus less chance of it dragging at your hard work. its also a good idea at this point to neaten up any existing work.. the top folds will most likely look less than great at this point as the putty has moved all over the place and been prodded a lot!
its at this point where i start to create the curve in the non billowy side of the tabard.. this is done by pushing out the ridge we created earler at the bottom and flattening it down against the model.
after this is done, we cut the corner into the tabard so it looks less squidgy and remove the recently pressed putty from the models leg.. (note the prod marks where my knife wasnt quite sharp enough to make it clean!)
now this can be curved quite easily with a bit of prodding.. but can also leave unsightly marks in the tabard..
the best way to avoid this is to roll a sausage of sculpey and use that to press against (same as the rest of the tabard) then remove it once your curve looks nice!
Stage 8.
using the tapered clay shaper we add some more definition to the overall shape of the tabard, the curve of the shaper works nicely for making natural curves in the material and the point on it allows us to determine how thick they are.. follow the curves created by the folds making them wider at the bottom and less defined.
once again at this point, start to neaten up the folds near the top, and look at the overall tabard.. does it look smooth? does anything look unnatural.. if it does try and correct it by gently smoothing it over with a clay shaper.. due to the mix of either miliput or sculpey in the putty its workable much longer and also less sticky so easier to blend and smooth.

once you are happy with it, or feel you can't do any more to improve it, leave it alone! once its cured you can cut a rough edge to look a little smoother, or sand out a bump thats annoying you.. if you still think you can do better, redo it.. how do you think i ended up with a redone version of my hq in the first place?
The End.. Until you start asking questions.
hopefully that all made sense.. as i say, if you need anything explained further i can do that, but im crap at writing stuff out so i've probably missed something hugely important.
oh and as a side note.. sculpey/greenstuff can dry a little rubbery as the sculpey requires heat to cure.. in the case of kaels tabard, i left him to cure over night, then blasted him with a hairdryer for a few minutes, then left him alone for a bit. i do find it to be a little nicer to work with than miliput/greenstuff for tabards, dunno why.. personal preference.
Thursday, 18 April 2013
COMPLETE!
Yes ladies and gentlemen, the title is correct.. Kael is complete.
sculpt wise anyway.

Now i just need to paint him up in a manner that does all my hard work justice.. something that i do not fare well at, im a lazy painter and enjoy limboing under the bar of effort.. so this is going to be interesting.
the axe head is just a placeholder still (the chainaxe paragon blade is happening when i get it) and is pinned in place, the head is just blutacked there atm (i primed it a lighter shade of grey for easier painting) and will be stuck down once all his armour and the such is airbrushed up to its basic colours.
i hope you like him, hes been an absolute blast to make and seeing him all primed up and awesome looking makes me smile.
Monday, 15 April 2013
sculpting.. not for the impatient.
rightio, its been a short while since i posted an update and 90% of that is because i want to post worthwhile stuff not just "look now he has a tiny tiny amount of difference from before!"
in the words of Simon Egan "sculpting is 90% looking 10% prodding" while this holds true for the most part.. its also a lie & it should read like this.. "sculpting is 29% looking, 1% prodding and 70% waiting for the damn thing to cure"


The cloak so far is coming along nicely (best one yet in my opinion) however its at this point when the model is starting to finally come together that getting impatient could cost me dearly, i still have a few small bits to do on his shoulder (scythe blades for the crossed scythe symbol) his gun and on one of his hips, and then need to work on the right hand shoulder section of the cloak however im looking at the model as it stands and i am happy with what i have done and am eager to see him ready for paint.
Friday, 12 April 2013
its the little things that make all the difference
Work on Kael 2.0 has been going quite well, and has shown me more than ever that patience is key when sculpting.


The skull on his chest will eventually be the deathguard symbol, but im not willing to cock it up by trying to sculpt the rest whilst the skull is still maleable.. its too much of a pain to sculpt something that small and fiddly only to stick your thumb on it or something.


The skull on his chest will eventually be the deathguard symbol, but im not willing to cock it up by trying to sculpt the rest whilst the skull is still maleable.. its too much of a pain to sculpt something that small and fiddly only to stick your thumb on it or something.
Wednesday, 10 April 2013
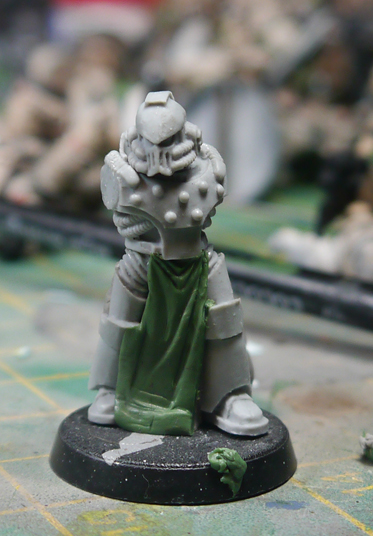
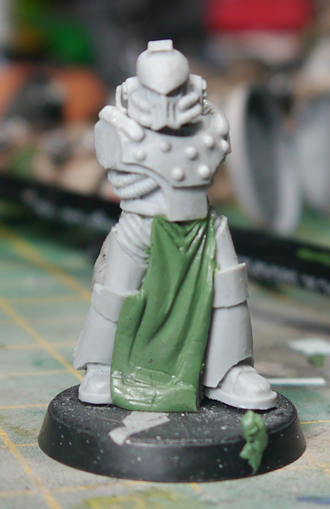
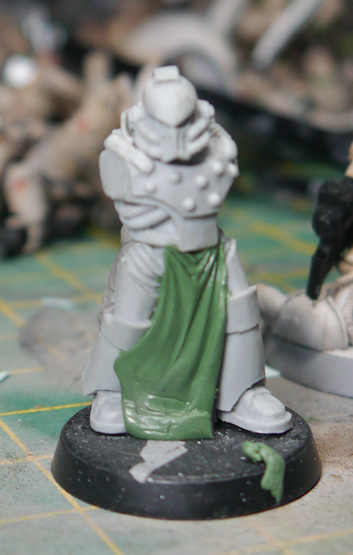
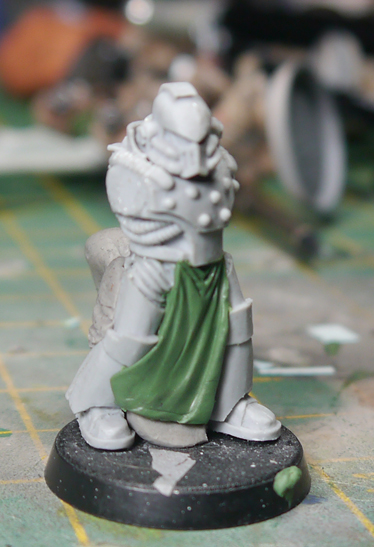
Kael Armaros 2.0
I am very much of the opinion that we should all push our abilities be it painting, sculpting or gaming to the best we can on occasion and strive to improve.. and after openday and talking to Simon Egan (the grand master of awesome) and showing him some photos of work to critique, i've decided i need to push myself and present something in the flesh at the heresy weekender for his judgement and critique..
And so, i present mk2 of kael.. wip atm, but with obvious lineage from his predecessor (foot on something mainly..)
 excuse the rubbing out on his chest. i was marking something up, didnt like it and will hopefully be sculpting a smaller version of the death guard symbol the original has emblazoned across his chest rather than rehashing the brass etch. The armoured hip pieces are inspired by the legion champion model and will be receiving more studs near the edges, i'm tempted to magnetize his arms from the shoulderpad down.. but unsure atm, all depends on wether i keep the combiflamer or not i guess.
excuse the rubbing out on his chest. i was marking something up, didnt like it and will hopefully be sculpting a smaller version of the death guard symbol the original has emblazoned across his chest rather than rehashing the brass etch. The armoured hip pieces are inspired by the legion champion model and will be receiving more studs near the edges, i'm tempted to magnetize his arms from the shoulderpad down.. but unsure atm, all depends on wether i keep the combiflamer or not i guess.
Subscribe to:
Posts (Atom)